How to Start a Blog: 5 easy steps to get you going
Starting a blog used to be something people do as a hobby, to document their daily lives, their travels or simply to share things they are interested in with family and friends.
Today, things have changed and there are many people who have turned to blogging to make an income online.
I have personally started a few blogs and they have helped me to generate some side income.
Would you want to learn how to start a blog too?
In this free guide, I want to give you a head start, a crash course if you will, to help you to start a blog by the end of today.
Are you afraid to start a blog?

You are probably thinking, hey sure I can write for my mom and pop and my friends, but to publish for the whole world to see? No thanks!
The truth cannot be further than that, as a blog is meant to be written in a personal style. Not everyone wants to read the New York Times or Wikipedia to learn something.
They want to learn it from someone just like them, someone who has gotten the feet wet and tells it to them in a friendly tone.
So that’s where you come into the picture, and in the process of sharing your knowledge, you gain supporters and start making an income online!
Why start a blog?
Different people will naturally have different reasons for starting a blog.
Here are the reasons that motivated me to start mine, and hopefully they can be of some inspiration to you to take action:
Make Money Online

I guess this is a no brainer. Who will complain about having a side income?
While this is not necessarily meant to replace your day job, it sure helps to have some extra cash every month to pay for gas, organise pizza nights or take your other half out on a nice date.
Share your passion and knowledge
For me, I was always on the lookout for good deals online and decided that lots of reviews were not detailed enough. That motivated me to start Reviews Mill to share my own honest reviews and help others in making informed decisions.
In your case, you might be a budding fashionista or a keen mountain climber, and all that knowledge you have gained while taking part in these activities are helpful to someone else just like you!
It does not mean you need to be an expert, but as someone who has been there and done that, and knows the learning curve, you are well-positioned to pass this info on to others. You might have a trick or two up your sleeves that no experts know about!
In fact, I was asked by a few friends about how to start a blog which inspired me to create this page.
Finding new opportunities for yourself
Frankly speaking, working a 9 – 5 day job and commuting to work every day is just not the lifestyle I want to have long term.
With that in mind, I wanted to find new opportunities for myself to get out of the rat race, and during the process, I made some valuable new friends and mentors online.
This was very important as that meant people who appreciate what you do will get in touch and from there, more opportunities will arise.
Steps to Start a Blog
Step 1: Find a niche
You will need to have a topic that you want to build your blog around, but with over 600 million blogs already out on the web, how do you decide which topic to choose from?
First of all, don’t be intimidated by that number. Lots of people are starting blogs every day, but how many of them actually stay the course and make it successful? With that in mind, as long as you put in the work and ride out the initial storms, you are way better than most people can ever be in their blogging career.
So what should you write about?
You can start off by listing down all the things that you are interested in, for example, hobbies, games, something you have intimate knowledge of, or even something that you are new to.
Once you have that shortlist, go over to Google Trends and check out if there’s interest in the subject you want to write about.
Look, if no one is interested in “man-eating animals that you can keep as pets”, then you should probably stay away.
Punch in your topic and check out the results. Here’s one for “exotic pets”:
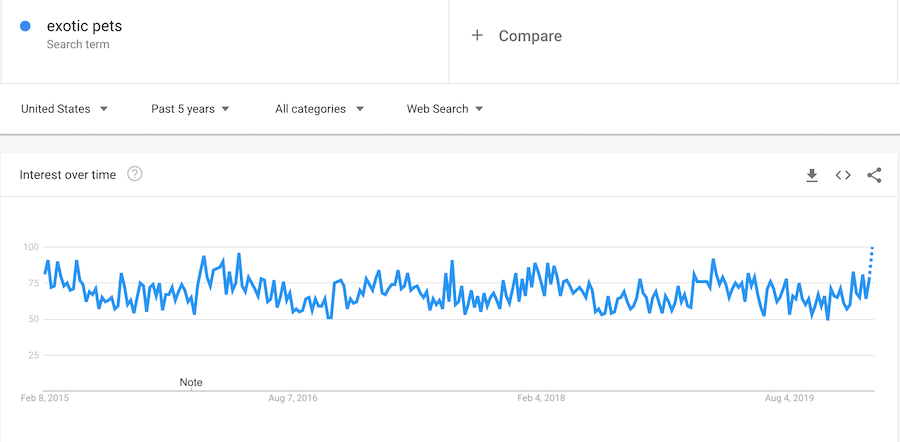
You can see that interest in this subject has been strong over the last 5 years, and in fact, is on an uptrend.
Further to that, you can install a free Chrome extension known as Surfer SEO and get an estimate of the number of searches on Google every month.
Here’s a look:

Great! Now you know there are people actually searching for your topic!
Step 2: Think of a name
The name of your blog is pretty important, and this will be your domain name.
What is a domain name? Basically it is the name that people will type in the browser to reach your site.
For example: google.com, facebook.com
At this point, I feel that I should give you a word of warning.
Do not overthink what the name should be.
A lot of times new bloggers are trying to think of the perfect name and waste lots of precious time on it.
Let’s face it.
How many of us can come up with a name like Adidas or Rolex easily?
My advice is this: limit your name to 2 or 3 words, using a combination of the topic + an adjective.
For example: gentleexoticpets.com
You will then need to find out if the name you have chosen is available by using this widget:
Step 3: Buy the domain and sign up for web hosting
Now that you have chosen your blog name, it is time to turn it into a reality.
There are several options online where you can start a blog for free, but I am going to advise against it.
You can sign up at WordPress.com (different from WordPress.org), Tumblr, Blogger and many more, but please don’t.
Here’s the blunt truth: If you are serious about using this blog to make money, you will need to invest in it.
Not just time, but a quality name and quality hosting.
2 things that I wish to point out here:
- Your own domain name will generally do better than a subdomain (e.g. gentleexoticpets.blogspot.com), as it indicates more authority and trust. Think about this, if you want to learn or buy something related to your exotic pet, which domain would you trust more?
- Getting your own hosting (essentially storage space and connectivity to your site provided by a web hosting company) gives you a lot more control over your blog. Imagine one of the free options goes bust, your site will be gone too.
Having said all that, you will be glad to know that domains and hosting can be found cheaply, and I recommend you to sign up through Bluehost, one of the biggest, most cost-effective and supportive web host around.
Personally, I have all my sites hosted with them, and to date have not had real issues.
I like that they have a support chat function where you can chat with an agent 24/7, or you can opt to call them on their hotline too.
I don’t know about you, but if someone told me I can set up a profitable and unique business for less than $100 per year, I would jump at the opportunity!
The shared hosting package comes with a free domain for 1 year, but take note that it does not have domain privacy. From the second year, the renewal for domain and privacy is around $35, which to me is not good value.
What I would instead do is to purchase a domain from Namecheap, which is cheap and comes with lifetime domain privacy.
Step 4. Set up your blog
Once you have purchased your domain and hosting service, you will be able to set up WordPress immediately through a step by step wizard.
Follow the instructions and you will then be brought to the “engine room” of your blog, the WordPress dashboard.
It is here where you write, design and publish your articles.
Take a few moments to familiarise yourself with the features, but in general, here are the important ones you need to know first:
Appearance –> Themes
Choosing a theme is like choosing a design template for your site. When choosing your theme, opt for simplicity for the start. Too many bells and whistles are just going to confuse you further.
I remember the first time I started a site and going through the different themes available. At the back of my mind, I was thinking, wow this is cool, I can get my site to look so nice.
But the truth is, a theme only provides a template, a structure of sorts, with which you have to build on yourself. Your site will not look like those in the demo or theme shop. So keep it simple at the onset.
I highly recommend that you check out Flatsome theme from ThemeForest. They make excellent themes and this one comes with a really simple to use page builder to further customise your website.
Almost any other time, you will need to download a theme and a page builder separately, but in this case, you get 2 in 1.
Posts and Pages
This is where you write your articles.
The main difference between a post and a page is longevity.
Imagine a website that has a Menu that reads: Home, About Us, Contact Us
These are all pages, where the content remains constant with minimal changes.
A post, on the other hand, will appear on the blog feed, where the latest will be shown.
These are your day to day articles. You can categorise them so that your readers can find them easily.
Plugins
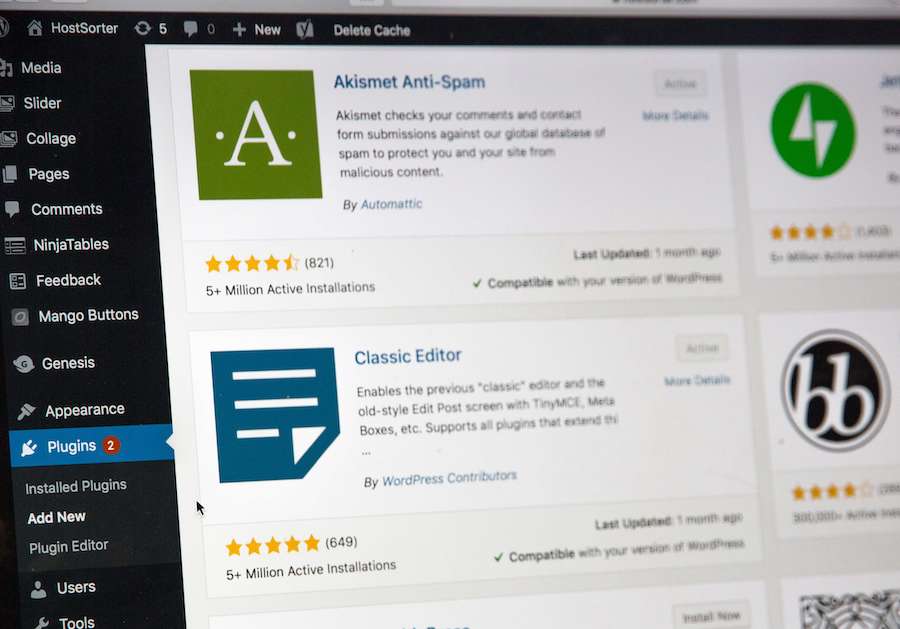
Plugins are tools that add functionalities to your site.
For example, you might want to have heightened security features to protect your site. That’s where a plugin comes into play.
You can download lots of free ones or go for paid options too, depending on your needs.
My advice when you first start out is to download and install the following:
- Classic editor – easier interface to use than the standard Gutenberg editor
- Updraft backup – create backup copies of your site
- Imagify – compress images to save space
- Rank Math – a plugin that helps you with SEO
Start writing!
To me, it is important to start developing a routine or habit to write.
Writing is not easy and takes time to get your used to (unless you are an established writer already).
Aim to publish regularly, and be sure to write articles that are in-depth and helps people solve a problem.
That usually means that the articles are long (more than 1500 words), and contain lots of actionable information.
If you are not confident of your writing skills, or simply do not want to write, you can outsource this part of your business.
My recommendation is to find writers on Upwork, a platform that connects freelancers and employers like yourself.
As a start, a decent rate to pay is $10 per 1000 words. Give chances to new writers too, as they might be able to produce excellent content for you at a reasonable rate.
Related: Stock Photos that don’t suck!
Go live
No one will find you if you don’t go live, so you should do that now.
There is no golden rule as to the number of articles you need, but my preference is to have at least 6-10 pieces of articles before going live.
This means you have built up a writing momentum and familiar with the steps to publish an article.
When visitors arrive at your site, there won’t be just 1 or 2 measly posts to peruse.
Step 5. Making Money

After you have done all the hard work to create your site, how do you monetise it?
Well, there are lots of ways to make money online, but I will share 2 of the best methods to do so, which happens to be really easy to implement.
The first method is to become an affiliate.
OMG what does that mean?
Relax, an affiliate is simply a middleman who promotes a product for a merchant.
Case in point: If you purchased something on Reviews Mill, it is likely that you are doing so through an affiliate link.
This link is provided to you when you sign up to become an affiliate.
Someone buys something, you get paid. Easy right?
There are lots of affiliate networks (a company who gathers merchants and affiliates together, rather than you finding a merchant one by one) out there, but there is a few that you should definitely sign up for first:
- Amazon Affiliate
- CJ (formerly Commission Junction)
- Wealthy Affiliate (lots of free training included)
- Web hosting companies such as Bluehost
- AppSumo software from Skimlinks
These are free to sign up so there is no cost whatsoever to invest before you rake in the dough!
Another method is to create your own digital product, such as an ebook, a digital course or video training.
You can create a professional ebook easily with Designrr, and if you create videos, you can host them on platforms such as Teachable, or host them on YouTube (but keep them private).
If you use YouTube as part of your promotion efforts, you can create a series of free videos that will lead your viewers to your paid content.
Make use of TubeBuddy to optimize your videos. You will thank me later. The software integrates seamlessly and helps you to rank better, which means more viewers.
The best part is, it is free! Or you can upgrade to the Pro version for a small fee.
Conclusion

As you can see, learning how to start a blog is not that difficult or complicated, all it takes is probably an hour or less.
I was really hesitant at first, thinking over months whether I should give it a go or not.
At the end of the day, it boils down to what you are aiming for.
If you look at this as a passion that potentially can make you a side income, or even one day replace your current income, you will be able to find the motivation to begin.
You decide how much time to invest, although I would advise an hour or 2 a day at least.
Once I started, there was really no turning back, and I got addicted to building new, informative, and helpful websites to fill the gaps of knowledge out on the internet.
My best advice to you is: do not attempt to learn and do everything at once. Stay focused on the steps mentioned here and until you start to have some articles, don’t try to learn everything under the sun.
This article is just the tip of the iceberg, as there is so much more to learn in this exciting world of blogging.
Are you up for the challenge? Get your free domain when you sign up with Bluehost and get started right away!