
The quietest video calls start with proper microphone placement. Position your mic at mouth level, about 6-12 inches away, and use a directional or cardioid mic to focus on your voice. Keep it away from noisy objects and vents. Avoid placing it too close, which causes distortion, or too far, which muffles sound. Small adjustments make a big difference. Continue optimizing your setup to guarantee professional, clear audio every time.
Key Takeaways
- Position the microphone 6-12 inches from your mouth at mouth level for optimal sound clarity.
- Use a directional or cardioid microphone to focus on your voice and minimize background noise.
- Keep the microphone away from noisy objects, vents, or sources of ambient sound to reduce distractions.
- Speak directly into the mic without touching or handling it to avoid unwanted noise and distortion.
- Test and fine-tune your mic placement in your environment to achieve the quietest, clearest audio.
Why Microphone Placement Is Key to Clear Video Calls
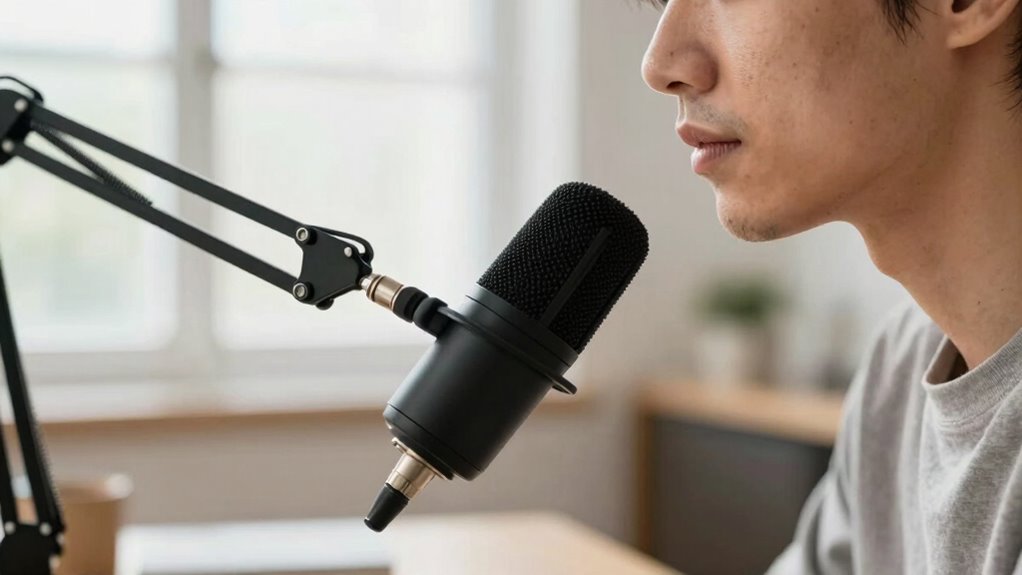
Proper microphone placement is essential for guaranteeing your voice comes through clearly during video calls. If you place your microphone too far, your voice may sound distant or muffled, forcing listeners to strain to hear you. Conversely, being too close can amplify background noise and cause distortion. Maintaining the right microphone distance helps balance your voice with ambient sounds, reducing background noise that can distract from your message. Positioning your mic correctly ensures your voice remains crisp and intelligible, even in a noisy environment. Remember, small adjustments in placement can considerably improve sound quality, making your communication more effective. Proper placement isn’t just about convenience—it’s about making sure your voice cuts through background noise and reaches your audience clearly. Additionally, being mindful of your home soundproofing can further enhance audio clarity by minimizing ambient noise that interferes with your microphone. Understanding microphone placement is also important for capturing the nuances of your voice, especially in professional or important conversations.
Best Microphone Positions to Reduce Noise and Improve Sound
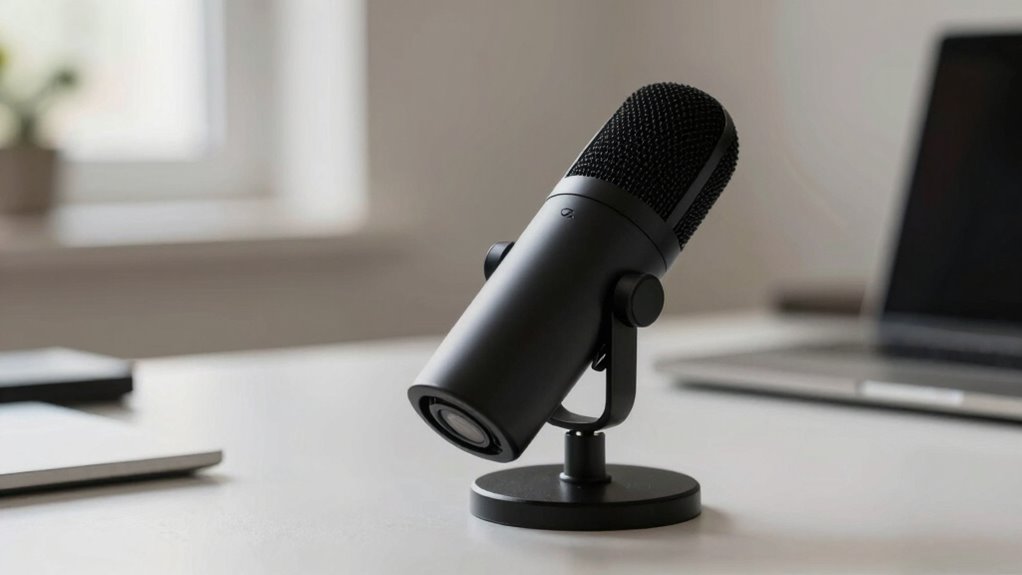
Choosing the right microphone position can make a significant difference in reducing background noise and enhancing sound clarity during your video calls. To minimize ambient noise and improve echo cancellation, position your microphone close to your mouth, but avoid touching your face or clothing. Keep it slightly off-center to reduce plosive sounds. Consider these placement tips:
- Place the mic at mouth level, about 6-12 inches away
- Use a directional microphone to focus on your voice
- Avoid placing the mic near noisy objects or vents
- Ensuring proper microphone placement can significantly improve audio quality and reduce unwanted noise. Proper positioning helps your microphone capture your voice directly, which is essential for sound clarity and minimizing background distractions. These positions help block ambient noise and reduce echo, making your voice clearer. Additionally, adjusting your microphone orientation can further enhance audio fidelity and comfort during long calls. Maintaining a consistent microphone position can also help your voice sound more natural and stable throughout your call, especially when using audio equipment designed for clarity.
Common Microphone Placement Mistakes and How to Avoid Them
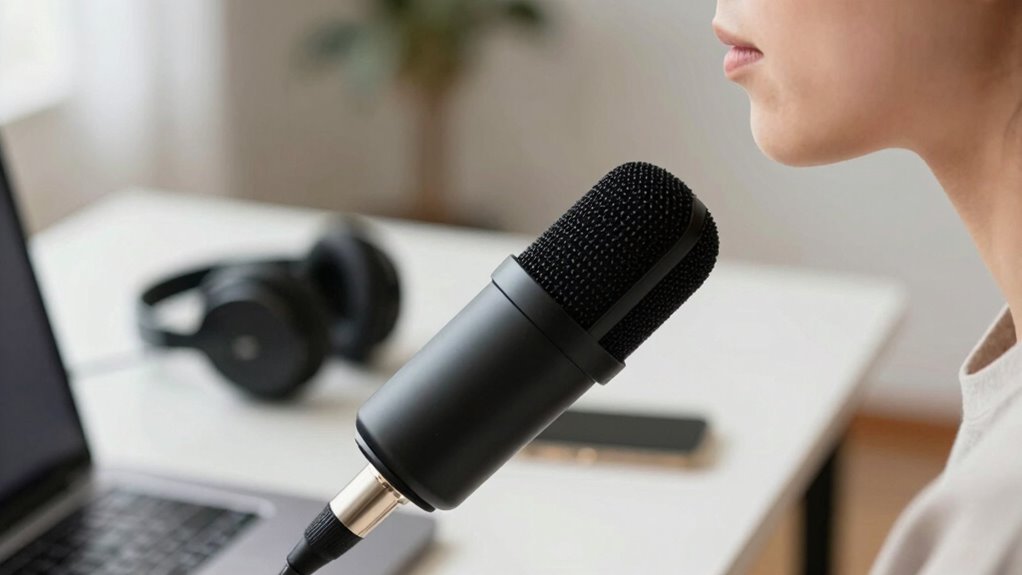
One common mistake is placing the microphone too close to your mouth, which can cause distortion and harsh plosive sounds. This placement also amplifies background noise, making it harder for others to hear you clearly. When the microphone is too close, it picks up more of your voice’s bass and unwanted sounds, while background noise becomes more prominent. To avoid this, keep the microphone at a proper distance—about 6 to 12 inches away—so your voice remains clear without capturing excessive background noise. Also, don’t overlook microphone proximity; maintaining consistent distance helps prevent sudden volume spikes or muffled sound. Proper placement minimizes background distraction and ensures your voice comes through crisp and clean, improving overall call quality. Using a detect passive voice tool can help identify and correct passive constructions in your speech or writing for clearer communication. Additionally, understanding cable failures can help prevent audio issues caused by faulty connections during calls. Being aware of regional audio variations can also help you adjust your setup to better suit your environment.
How to Adjust Your Microphone for Different Environments

Adjusting your microphone for different environments guarantees your voice remains clear regardless of surrounding noise. To minimize background noise and improve echo reduction, consider these adjustments:
- Use a directional microphone or cardioid pattern to focus on your voice and block out unwanted sounds.
- Position the microphone closer to your mouth to reduce ambient noise and echo.
- Apply acoustic treatments like soft furnishings or panels to absorb sound reflections and dampen echo.
- Ensuring proper microphone placement can significantly enhance audio quality and reduce distractions during calls.
- Proper microphone technique also involves speaking directly into the mic and avoiding handling noise that can introduce unwanted sounds.
- Being aware of your acoustic environment helps you make more effective adjustments to optimize sound quality.
- Regularly testing your setup in different settings allows you to better understand how environmental factors impact your audio quality and make necessary adjustments.
- Understanding the soundproofing options available can further help isolate your microphone from external noises.
These steps help you adapt quickly, ensuring your audio stays crisp no matter where you’re calling from. Remember, environment-specific adjustments make a significant difference in achieving professional, quiet video calls. Fine-tuning your setup for each space ensures your voice always comes through clearly, free of distracting background noise and echo.
How to Test and Fine-Tune Your Microphone Setup for Perfect Audio

To make certain your microphone setup produces perfect audio, it’s vital to test your voice and listen carefully to the results. Record yourself speaking naturally, then play back the recording to evaluate clarity and background noise. Check if noise cancellation features are effectively reducing unwanted sounds without muffling your voice. Adjust your microphone’s volume balancing so your voice sounds natural and consistent, avoiding distortion or being too quiet. Use a quiet environment to detect any remaining background noise and tweak your settings accordingly. Make small adjustments and retest until you achieve clear, balanced audio. Regular testing ensures your microphone captures your voice accurately while minimizing distractions, resulting in a professional and quiet video call experience. Being aware of security measures can help protect your data during online calls and recordings. Additionally, understanding how to properly position your microphone can significantly enhance sound quality and reduce ambient noise. Paying attention to microphone placement techniques can further optimize your audio quality in various environments, especially in spaces with smart security devices that can help monitor your recording area. Proper microphone calibration ensures consistent sound levels and clarity across multiple sessions.
Frequently Asked Questions
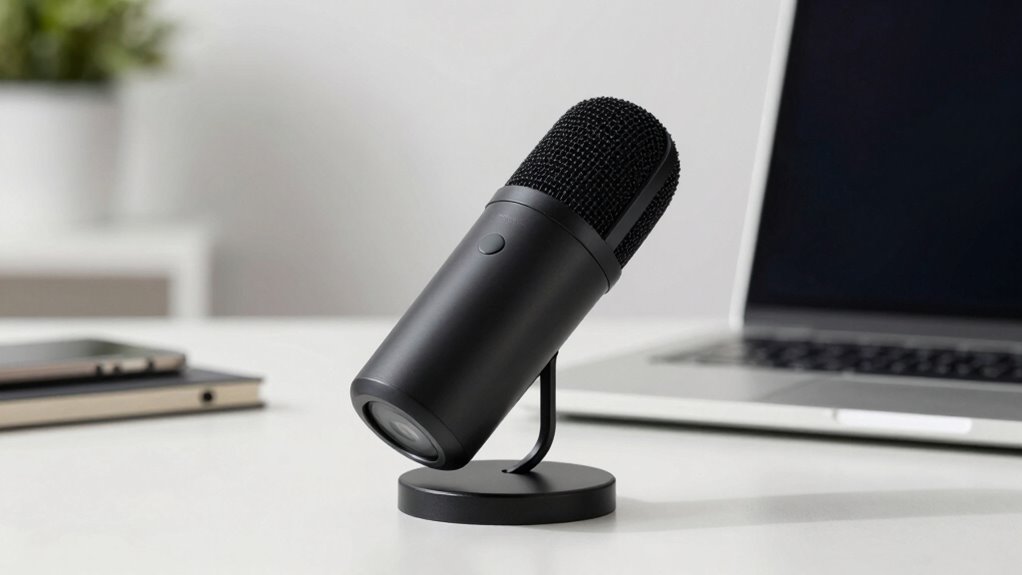
What Types of Microphones Are Best for Quietest Calls?
You should choose a directional microphone, like a cardioid or hypercardioid, to minimize background noise and reduce microphone sensitivity to surrounding sounds. These mics focus on your voice, making calls clearer and quieter for others. Avoid highly sensitive microphones that pick up every noise around you. Proper placement also helps, but selecting the right microphone type guarantees the quietest calls by focusing on your voice and blocking out background noise.
How Does Room Acoustics Affect Microphone Placement?
Ever wondered how room acoustics influence your microphone placement? They play a huge role in reducing room echo and enhancing sound absorption. To get clear audio, position your microphone away from reflective surfaces like walls or windows and add soft furnishings or acoustic panels where possible. Don’t forget—proper placement minimizes unwanted reverberations, making your calls much quieter and clearer. Isn’t that a simple way to improve your sound quality?
Can Microphone Position Influence Caller Perception?
Yes, microphone position can substantially influence caller perception by impacting audio quality. When you position your microphone correctly, it captures clearer sound, making your voice more intelligible and professional. Good microphone ergonomics ensure comfort during long calls and help maintain consistent audio quality. Proper placement minimizes background noise and echoes, so your caller perceives you as more attentive and confident, ultimately improving communication and overall impression.
Are Wireless Microphones Suitable for Professional Video Calls?
Wireless microphones are suitable for professional video calls, especially since 85% of users prefer seamless wireless connectivity. They give you freedom of movement and reduce clutter, making your appearance more polished. Just keep an eye on battery life, as it’s essential for uninterrupted calls. With good wireless connectivity and sufficient battery life, wireless microphones can deliver clear, professional audio, enhancing your overall video call experience.
How Often Should I Reposition My Microphone During Calls?
You should reposition your microphone whenever you notice increased background noise or if your voice sounds muffled. Keep an eye on your microphone sensitivity settings, adjusting them if your voice isn’t clear or if background noise becomes distracting. Repositioning regularly guarantees consistent sound quality, especially if you change your position or environment during the call. This proactive approach helps maintain professional audio and minimizes disruptions caused by background noise.
Conclusion
Remember, proper microphone placement can reduce background noise by up to 50%, making your video calls much clearer. By positioning your mic correctly and testing beforehand, you’ll create a quieter, more professional environment. Don’t forget, spending just a few minutes adjusting your setup can markedly improve audio quality. With these tips, you’ll experience crisper calls and better communication—so start experimenting today and enjoy the difference it makes!