
When you set a high DPI for scanning, it doesn’t always mean you’ll get a better image. If your original isn’t sharp or is blurry, enlarging it with high DPI just highlights those flaws. Also, choosing an excessively high DPI can lead to bigger files without added detail. Proper calibration, using the right resolution for each task, and understanding your scanner’s limits matter more. Keep going to discover how to get the crisp scans you want.
Key Takeaways
- Increasing DPI doesn’t improve image quality if the original scan is blurry or low-quality.
- High DPI can magnify flaws like blurriness, dust, or focus issues, making them more noticeable.
- Proper calibration ensures color accuracy across different DPI settings, preventing color distortions.
- Excessively high DPI results in large files with no visible detail gains, wasting storage and processing power.
- Choosing an appropriate DPI for your needs (e.g., 300 DPI for documents) yields better results than simply maximizing resolution.
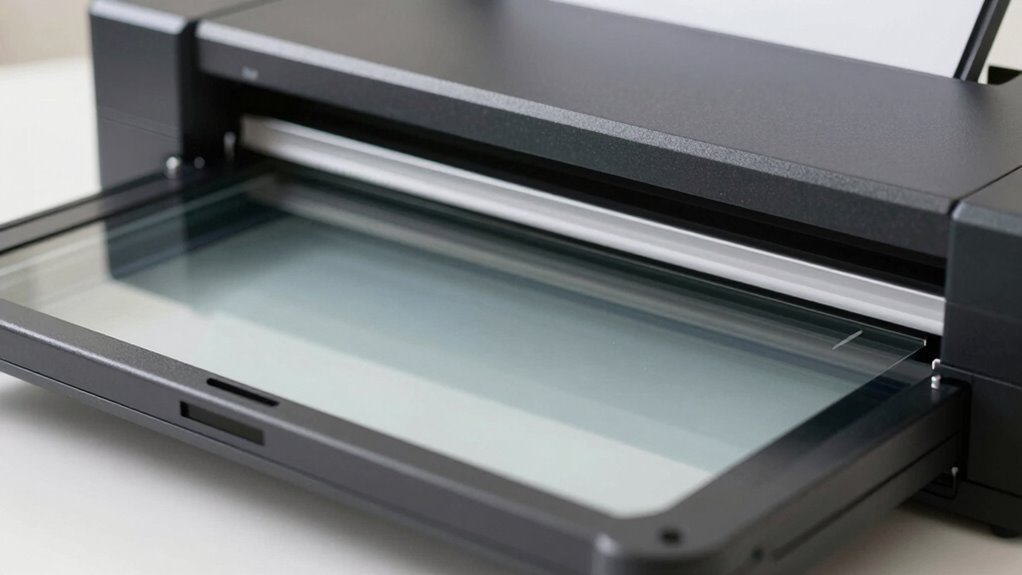
What Does Scanner DPI Really Mean?
When you see scanner DPI, it actually refers to the number of dots per inch the scanner can capture when creating a digital image. Higher DPI means more detail, but it also influences file size and quality. Color calibration plays a role here, as accurate color reproduction ensures your scan reflects the original colors, especially at higher resolutions. Keep in mind, increasing DPI often results in larger files, which might require file compression to store or share efficiently. However, excessive compression can reduce image quality and obscure fine details. Understanding DPI helps you balance resolution, color accuracy, and file size, so you can choose settings that suit your needs without sacrificing quality or creating unnecessarily large files. Proper calibration ensures that your scans maintain consistent color fidelity across different resolutions. Additionally, being aware of scanner settings can help optimize the balance between image quality and file manageability. Being knowledgeable about digital image quality factors can further enhance your control over the final output, especially since resolution choices directly impact how well details are preserved in your scans. Recognizing the influence of sensor quality can also help you select the best scanner for your specific needs.
How Scanner Resolution Affects Your Scan Quality
Higher scanner resolution directly impacts the clarity and detail of your digital images. When you choose a higher DPI, your scans capture more detail, improving overall quality. However, this also emphasizes the importance of scanner calibration to maintain color accuracy and avoid color shifts or dullness. Keep in mind:
Higher resolution improves detail but requires proper calibration to ensure accurate, vibrant scans.
- Increasing resolution can reveal flaws if your scanner isn’t calibrated properly.
- Higher DPI doesn’t always mean better color accuracy without proper calibration.
- Excessively high resolution can produce large file sizes with minimal detail gains.
- Proper calibration ensures your scans retain true colors, regardless of resolution.
- Considering scanner hygiene and maintenance can also affect the final scan quality.
- Understanding how scanner resolution interacts with calibration helps you achieve optimal results.
- The choice of traditional techniques and materials in crafts can influence how detailed your scans need to be to capture textures accurately.
- Recognizing the role of color management is essential for consistent and accurate color reproduction.
- Balancing scan speed with resolution settings can help optimize workflow efficiency without sacrificing quality.
Ultimately, understanding how resolution affects quality helps you balance detail, color accuracy, and file size for ideal results. Proper calibration is key to achieving the best scan quality at any resolution.
Why Higher DPI Doesn’t Always Mean Better Images
Just because you set your scanner to a high DPI doesn’t mean your images will automatically look better. Higher DPI increases pixel density, which can seem like it should improve image clarity, but that’s not always the case. If your original image is low quality or blurry, cranking up the DPI just enlarges the pixels, making flaws more visible. Conversely, a high-quality original scanned at a lower DPI can produce a clear, detailed image. Remember, more isn’t always better. Excessive DPI can lead to larger files without noticeable improvements in detail. Ultimately, ideal image quality depends on balancing DPI with the original image’s quality. Understanding this helps you avoid disappointment and ensures your scans look sharp and professional.
How DPI, Scan Size, and Original Image Quality Connect
DPI, scan size, and original image quality are closely interconnected, and understanding their relationship helps you produce better scans. When you adjust DPI, it affects the final scan’s color accuracy and file compression. Larger scan sizes at high DPI can capture more detail but may also increase file size and reduce color fidelity if the scanner isn’t calibrated. To optimize your results, keep in mind:
- Higher DPI isn’t always better if the original image lacks detail.
- Increasing scan size without adjusting DPI can lead to blurry or pixelated images.
- Proper calibration ensures accurate color reproduction.
- Balancing DPI and scan size helps prevent excessive file compression, maintaining image quality.
- Recognizing the limitations of digital resolution ensures you set realistic expectations for your scans.
- Being aware of digital image fidelity helps you make informed decisions about scan settings and quality. Additionally, understanding resolution trade-offs allows you to find the optimal balance between detail and file management.
Common Mistakes That Make High-Res Scans Look Blurry
One common mistake is using improper resolution settings, which can make your high-res scans look blurry instead of sharp. Enlarging images beyond their ideal size often causes pixelation, reducing clarity. Additionally, poor scanning techniques, like inconsistent focus or incorrect calibration, can result in unclear, fuzzy images.
Improper Resolution Settings
When you set your scanner’s resolution too low or too high, the results can be disappointing. Incorrect resolution calibration or improper software settings often cause blurry or pixelated images. To avoid this, make sure your scanner’s resolution matches your intended use. Here are common mistakes to watch out for:
- Using too low a resolution for detailed images, resulting in loss of detail.
- Setting an excessively high resolution, which creates unnecessary file size without quality gains.
- Failing to adjust software settings properly to match the scanner’s native resolution.
- Ignoring recommended resolution settings for specific document types or purposes.
- Not understanding how scanner resolution influences image quality and file management, which can impact your workflow and output. Properly configuring scanner resolution calibration ensures optimal results and prevents issues with image clarity.
Adjusting resolution calibration and software settings correctly is key to producing sharp, clear scans that meet your expectations.
Excessive Image Enlargement
Although capturing a high-resolution scan provides more detail, enlarging that image excessively can make it appear blurry or pixelated. When you zoom in too much, you’ll notice a loss of sharpness and reduced color accuracy, making the image look flatter or washed out. This happens because enlarging increases the file size, often prompting you to rely on file compression, which can degrade image quality further. Over-enlargement also magnifies any imperfections, such as noise or color inconsistencies, resulting in a less professional appearance. To avoid this, keep your enlargements within a sensible scale, and always work from the highest quality scan possible. Proper resizing preserves detail, color fidelity, and overall image clarity, preventing your high-resolution scans from looking blurry or distorted. Additionally, understanding how microplastics in dust can influence indoor air quality emphasizes the importance of maintaining high-quality digital images for accurate documentation and analysis.
Poor Scanning Technique
Poor scanning techniques are often the main reason high-resolution scans appear blurry. When you rush or skip important steps, you risk introducing digital noise and losing color accuracy. To avoid this, keep in mind these common mistakes:
- Using the wrong scanner settings – set the correct DPI and color profile for your document.
- Moving the document during scanning – even slight shifts cause blurriness.
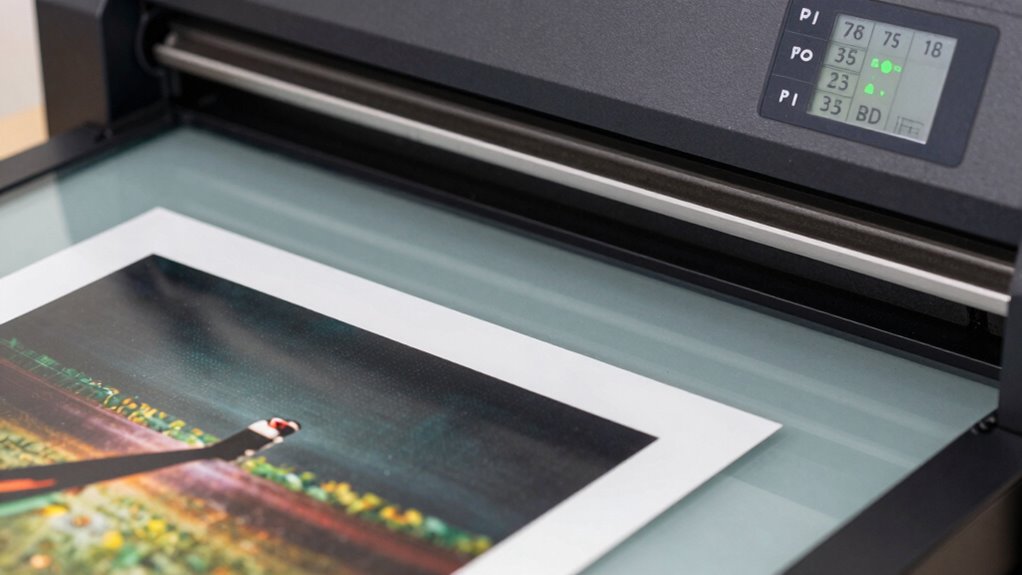
- Not cleaning the scanner glass – dust or smudges create artifacts that degrade quality.
- Ignoring calibration – improper calibration leads to inaccurate colors and increased noise.
- Overlooking the scanner’s capabilities – understanding your scanner’s resolution limits helps ensure your scans are crisp and detailed.
Tips to Get Sharp, Clear, High-Quality Scans
Getting sharp, clear scans begins with choosing the right scanner settings. Start by selecting the appropriate resolution—generally 300 DPI for most documents and photos. This guarantees your scans have enough detail without creating unnecessarily large files. Adjust settings to optimize color accuracy, which makes your scans look true to the original. Use the correct file format; TIFF preserves quality for editing, while JPEG is suitable for sharing but may reduce detail with compression. Keep your scanner glass clean and handle originals carefully to avoid blurs. Preview scans before finalizing, and make small adjustments to contrast and brightness if needed. Additionally, ensuring the proper maintenance of your scanner can prevent issues that degrade image quality. These simple steps help you produce crisp, vibrant, high-quality scans every time.
What’s the Best DPI to Use for Different Scanning Needs?
Choosing the right DPI setting depends on what you plan to do with your scanned images. For general document copying, 150-300 DPI is enough and aligns with scanner marketing claims. If you’re digitizing photos for printing or archiving, 600 DPI offers better detail. For large-format prints or detailed artwork, 1200 DPI or higher ensures quality. Keep in mind dpi myths often suggest higher is always better, but that’s not true—more DPI increases file size without improving quality in many cases.
Here are key points to contemplate:
- Match DPI to your final use (print or digital).
- Higher DPI isn’t always necessary for web images.
- Don’t fall for dpi myths that higher always equals better.
- Balance quality with file size to optimize results.
Frequently Asked Questions
How Does Scanner Sensor Quality Influence Image Clarity at Different DPIS?
Your scanner sensor quality directly impacts image clarity at different DPI levels. A high-resolution sensor captures more image detail, resulting in sharper, more accurate scans even at higher DPI settings. Conversely, a low-quality sensor struggles to preserve clarity as DPI increases, leading to pixelation and blurry images. So, investing in a sensor with better resolution guarantees your scans stay clear and detailed, no matter the DPI you choose.
Can Scanning at Higher DPI Damage or Degrade the Original Document?
Scanning at higher DPI won’t damage or degrade the original document because your scanner captures images digitally without physical contact. This process helps in document preservation by avoiding handling or exposure to light that could harm the paper. Just guarantee you use appropriate scanner resolution for your needs, as excessively high DPI can produce large files without improving quality. Properly managing scanner settings preserves your documents while maintaining high image clarity.
What Role Does Scanner Software Settings Play in Image Sharpness?
Your scanner software settings are the key to image sharpness; they can make or break your scan quality. Think of it like tuning a musical instrument—you need proper software calibration to achieve ideal clarity. If you overdo image sharpening, your scans can look unnatural or pixelated. Adjust these settings carefully, balancing sharpness and detail, to guarantee your scanned images are crisp without sacrificing quality.
How Do Color Depth and Bit Depth Impact Scan Quality?
Color depth and bit depth directly impact your scan quality by enhancing color accuracy and image depth. Higher bit depths allow your scanner to capture more color information, resulting in richer, more vibrant images. When you increase color depth, your scans display subtle color variations better, giving a more realistic appearance. To improve overall scan quality, set your scanner to the highest bit depth supported, ensuring detailed, true-to-life results.
Is It Better to Scan Multiple Times at Lower DPI or Once at a Higher DPI?
You should scan once at a higher DPI for better resolution consistency and overall quality. Multiple scans at lower DPI can reduce image clarity and introduce inconsistencies, even if it seems faster. Higher DPI captures more detail in a single pass, saving you time in the long run and ensuring your scan’s resolution remains sharp and consistent. Prioritize a single, high-DPI scan for ideal results and efficiency.
Conclusion
Understanding scanner DPI is your secret weapon for perfect scans. Remember, higher isn’t always better—sometimes, it’s like trying to fit an ocean into a teacup. Focus on matching DPI to your project, use sharp originals, and avoid common mistakes. With these tips, you’ll transform your scans from blurry messes into crystal-clear masterpieces. Master DPI, and watch your scans become as stunning as a masterpiece in a museum—without needing a gallery!