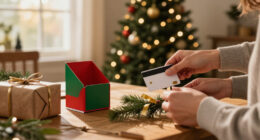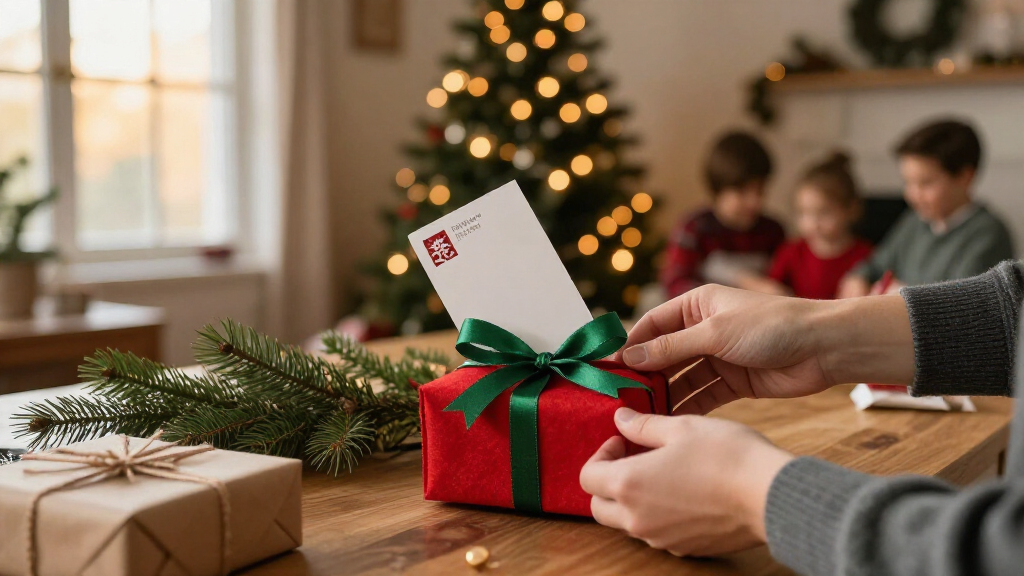

Make a festive paper holder that keeps a standard gift card secure and gives it a more personal presentation. This beginner guide is for anyone who can use scissors and fold paper; no special crafting experience is needed. Allow about 30-45 minutes for one holder, including decorating and drying time.

Get your next haul delivered free with Prime
- Fast, free delivery on millions of items
- Prime Video, Amazon Music and more included
- Member-only deals all year
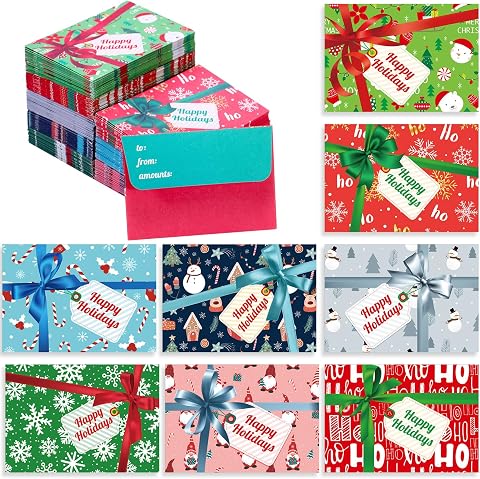
Cholemy Christmas Gift Card Envelopes, 200 Count
- ✔ Brand: Cholemy
- ✔ Quantity: 200 envelopes
- ✔ Designs: 8 styles, 25 per style

Zhanmai Christmas Mini Gift Card Envelopes, 48 Count
- ✔ Brand: Zhanmai
- ✔ Quantity: 48 envelopes
- ✔ Designs: 4 styles, 12 each

Kosiz Christmas Gift Card Envelopes, 200-Pack, 2.7 x 3.9 Inches
- ✔ Brand: Kosiz
- ✔ Quantity: 200 envelopes
- ✔ Designs: 8 styles, 25 per style
Difficulty: Beginner | Time: 30-45 minutes for one holder
What You’ll Need
Tools & Materials:
- Cardstock, about 8.5 by 5.5 inches
- Ruler
- Pencil
- Scissors or a craft knife and cutting mat
- Bone folder or the back of a spoon
- Double-sided tape or glue stick
- Gift card for sizing
- Decorative paper, stickers, ribbon, or markers
Knowledge:
- Basic measuring and paper folding
- Safe handling of scissors or a craft knife
A standard gift card is about 3.4 by 2.1 inches, but cards and packaging can vary. Use the actual card as a template when possible. Choose cardstock that folds cleanly without cracking; very thick board can be difficult to crease.
Cholemy Christmas Gift Card Envelopes, 200 Count
When a holiday list includes many recipients, Cholemy gives us the most balanced bulk option. Its 200 envelopes arrive in eight designs, with 25 of each, so we can add some visual variety without having to assemble several different sets. The recipient and sender spaces also make it easier to keep cards organized when preparing multiple gifts at once.The self-sealing closure is the practical distinction here. Compared with Kosiz’s saliva-activated strip and Zhanmai’s gummed closure, Cholemy’s stated self-seal avoids moistening the adhesive, which can make a large batch simpler to finish. The tradeoff is that it is still a small paper envelope, measuring about 2.76 by 3.94 inches. It suits a standard gift card, coins, tips, or a business card, but gives little room for a note or anything bulky. Its Christmas styling also limits its usefulness beyond the season. For high-volume holiday gifting, though, it is the easiest set in this lineup to recommend.
Pros:
- 200 envelopes for a long recipient list
- Eight designs with 25 envelopes per style
- Self-sealing closure for convenient assembly
- Sender and recipient spaces help identify gifts
Cons:
- Compact dimensions limit contents to small items
- Holiday graphics may not suit other occasions
- Paper construction is not intended as a sturdy keepsake
Best for: Gift-givers preparing many holiday cards who want assorted designs and a closure that does not require moistening.
Not ideal for: Anyone needing roomy holders, reusable packaging, or designs that work throughout the year.
Bottom line: For large holiday batches, Cholemy combines the lineup’s most convenient closure with generous quantity and design variety.
“For large holiday batches, Cholemy combines the lineup’s most convenient closure with generous quantity and design variety.”
Zhanmai Christmas Mini Gift Card Envelopes, 48 Count
Zhanmai is the sensible pick when 200 envelopes would be more than we need. Its 48-count set contains four designs in red, green, blue, and pink, with 12 of each. That is enough variety to make a modest group of gifts look coordinated while keeping the remaining supply smaller than the Cholemy and Kosiz sets.The envelopes share roughly the same compact footprint as the other two picks, so we can expect a similar fit for standard gift cards and small additions such as cash or coins. The difference comes at the flap: its gummed closure requires moistening, unlike Cholemy’s self-seal. For a few dozen envelopes, that is a manageable extra step; for a much larger batch, Cholemy is the more convenient option. The four-color assortment is straightforward rather than especially broad, and the Christmas theme narrows when we can use them. Choose Zhanmai for a shorter gifting list, but skip it if you need a bulk supply or want a closure that seals without moisture.
Pros:
- 48 envelopes suit a smaller gifting list
- Four colors provide a simple assortment
- Compact format is designed for gift cards and small items
- Paper envelopes are light and easy to tuck into a card or bag
Cons:
- Gummed closure must be moistened
- Fewer envelopes and designs than the 200-count sets
- Small size limits what can be enclosed
Best for: People giving a few dozen holiday gift cards who prefer a smaller assortment in four distinct colors.
Not ideal for: Large organizations or families with extensive recipient lists, and anyone who wants a dry, self-sealing flap.
Bottom line: Zhanmai is the more measured choice for a short holiday list, provided moistening the flap is not a drawback.
“Zhanmai is the more measured choice for a short holiday list, provided moistening the flap is not a drawback.”
Kosiz Christmas Gift Card Envelopes, 200-Pack, 2.7 x 3.9 Inches
Kosiz matches Cholemy on the two big bulk measures: 200 envelopes and eight Christmas designs, with 25 of each. That makes it a practical alternative for a long gifting list when the visual variety matters more than a small-batch format like Zhanmai. The listed 2.7-by-3.9-inch dimensions are also close to the other options, so we should expect a similar fit for standard gift cards rather than a roomier holder.Its defining detail is the saliva-activated adhesive strip. This keeps the closure simple, but it does require moistening; Cholemy’s self-sealing flap is the more convenient choice for preparing a large pile. Kosiz does cover the same small extras—cash, coins, tips, and business cards—and the compact format is easy to slip into a pocket or wallet. Still, its paper construction and limited dimensions leave little protection or space for larger contents. Pick Kosiz when you want a 200-piece assortment and its closure suits your routine; favor Cholemy if minimizing sealing steps is the priority.
Pros:
- 200 envelopes provide a large supply
- Eight designs with 25 envelopes per style
- Adhesive strip offers a straightforward flap closure
- Compact envelopes can hold cards, cash, coins, tips, or business cards
Cons:
- Adhesive strip is saliva-activated
- Paper may be less durable than sturdier packaging
- Compact size is unsuitable for larger items
Best for: Bulk holiday gift-givers who want eight designs and are comfortable moistening an adhesive strip.
Not ideal for: People who prioritize a self-sealing closure or need holders for oversized cards and bulky add-ins.
Bottom line: Kosiz is a capable high-volume alternative to Cholemy, with the same count and design variety but a closure that needs moistening.
“Kosiz is a capable high-volume alternative to Cholemy, with the same count and design variety but a closure that needs moistening.”
As an Amazon Associate we earn from qualifying purchases.
Before You Start
Clear a flat work surface and check that your adhesive will not show through the paper. If using a craft knife, cut on a mat and keep fingers away from the blade path. Make a quick paper mockup if you are using an unusually large card or want to produce several holders.
Step-by-Step Instructions
Step 1: Measure the gift card
Place the gift card on the cardstock and measure its width and height. Add about 0.25 inch to each measurement for comfortable clearance. Record those dimensions; the pocket should hold the card without bending it or letting it slide out.
Tip:If the gift card is inside a sleeve, measure the sleeve instead. Leave a little extra room around the sleeve.
Check: You have the card’s width and height written down, with a small clearance allowance.
Step 2: Cut the holder base
Cut a rectangle of cardstock about 8.5 inches wide by 5.5 inches tall. Position it horizontally. This gives room for a front panel, a back panel, and a pocket; adjust the size if your card is larger.
Tip:Use a ruler to mark the cut lines lightly in pencil before cutting. Neat, square edges make the folded holder easier to assemble.
Check: The base is a clean rectangle with no torn corners or ragged edges.
Step 3: Mark the folds
With the rectangle horizontal, measure 4 inches from the left edge and draw a light vertical line. Measure another 4 inches from that line and mark a second fold. The remaining short section forms a flap. Score both lines gently with a bone folder or the back of a spoon, then fold along them.
Tip:Score without cutting through the cardstock. A shallow score helps the paper fold straight and reduces cracking.
Check: The base folds into three connected panels, with a narrow flap at one end.
Step 4: Make the card pocket
Cut a piece of cardstock slightly wider than the gift card and about 2.75 inches tall. Center it on the lower portion of the inside panel. Apply adhesive along the pocket’s left, right, and bottom edges, then press it in place. Leave the top edge open so the card can slide in.
Tip:Keep adhesive close to the edges. Glue spread into the opening can catch the card or seal the pocket shut.
Check: The pocket is attached on three sides and has a clear opening along the top.
Step 5: Test the fit
Slide the gift card into the pocket before decorating. Check that it enters easily, sits flat, and stays in place when you tilt the holder gently. If the pocket is too tight, carefully lift one side and reposition it with a little more room.
Tip:Do not force the card into a tight pocket; it can crease the card or tear the holder.
Check: The card goes in and comes out without catching, and the pocket holds it when tilted slightly.
Step 6: Decorate the holder
Remove the card and decorate the outside front panel. Add a holiday greeting, patterned paper, stickers, or a small ribbon. Keep embellishments flat near the fold so the holder can close without bulging.
Tip:Write the recipient’s name on the front or inside. Let ink and wet glue dry before closing the holder.
Check: The front looks finished, and decorations do not cover the pocket opening or fold lines.
Step 7: Close and secure the holder
Fold the panels closed with the pocket inside. Wrap a short length of ribbon around the holder and tie a bow, or attach a small paper band with removable adhesive. Keep the closure easy to open so the recipient can access the card without tearing the holder.
Tip:Test the closure with the card inside. A tight band can bend the card or distort the paper.
Check: The holder stays closed during handling, opens cleanly, and the card remains flat inside.
Common Mistakes to Avoid
- Decorating over folds or using bulky embellishments. — Keep folds clear and use flat decorations so the holder closes evenly.
Troubleshooting
Problem: The holder will not stay closed.
Solution: Use a ribbon, paper belly band, or a small removable adhesive dot on the outer flap. Avoid putting adhesive where it can contact the card.
What Success Looks Like
The finished holder closes neatly, keeps the gift card flat and secure, and lets the recipient remove it without tearing the paper. The pocket opening remains clear, the folds are intact, and the decoration does not interfere with opening or closing.
Next Steps
Write a short personal message inside, then place the holder in an envelope or gift bag. For multiple recipients, use the first holder as a template and test one completed sample before cutting the rest. Store unused holders flat and dry.
Frequently Asked Questions
Can I make a holder without a pocket panel?
Yes. Fold the card inside the holder and secure it with a paper band or a small paper corner tab. Check that the card cannot slide out when the holder is tilted.
What paper works best?
Cardstock is sturdy enough to hold its shape and fold cleanly. Lightweight paper may need a cardstock backing, while very thick board can be hard to crease.
How do I make holders for cards of different sizes?
Measure each card or its sleeve, add clearance, and resize the pocket. Keep the same general folding layout, adjusting the base panels as needed.
Can I use glue instead of double-sided tape?
Yes. Use a thin layer of glue along the pocket edges and let it dry fully before inserting the card. Too much glue can seep into the pocket opening.